Jenkins Declarative Pipeline with Example | Step by Step process for creating Jenkins Pipeline
Jenkins is a powerful application that allows continuous integration and continuous delivery of projects. Jenkins is open source and can handle any kind of build or continuous integration.
In this tutorial, we will see how we can create our first Jenkins Pipeline with single and multiple. Let's follow step by step and you have your first Jenkins Pipeline project.
Jenkins Pipeline with Single Stage
Step 1 : Create new Item
Select + New Item button on Jenkins dashboard
Step 2 : Select Pipeline Project and Name
Select Pipeline from given listed projects and enter any name you want to give your first pipeline project.
After click on OK you will land on configure page of our pipeline.
Step 3 : Creating Pipeline Script
Here in Definition drop down select Pipeline script. You will get another drop down at right side in Script section, select Hello World from that and It will automatically generate Hello World script for us.
Step 4 : Build Pipeline Project in Jenkins
Now everything we have done for creating our first Pipeline project. Just click on Build Now button and it will start to build our pipeline job.
Step 5 : Console Output of Jenkins Pipeline Project
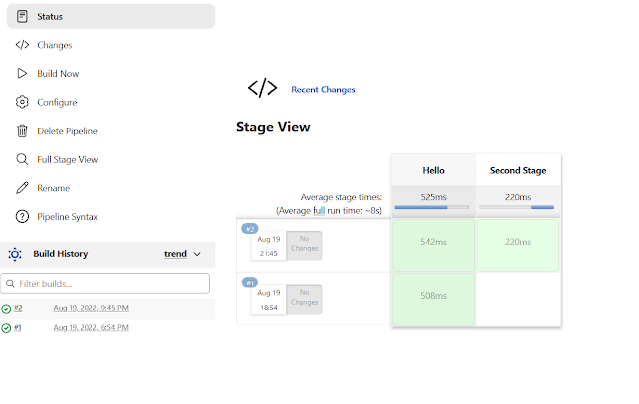
You can see #1 on Build History with Green Right tick, that means our pipeline project build successfully. We can also see Stage View. We have only 1 stage Hello in our Script so it will show only one stage.
For see Console Output,
- Click on Green Right tick of Build History section.
- Click on number -> Console Output
It will show Hello World message as well as SUCCESS message also.
 Lets see how our console output display if we add another stage in our script.
Jenkins pipeline with Multiple Stages
Step 1 : Adding Another step in Jenkins Pipeline
For adding another stage in Jenkins pipeline, go to our pipeline project -> Configure
Add following code in our script
pipeline {
    agent any

    stages {
        stage('Hello') {
            steps {
                echo 'Hello World'
            }
        }

        stage('Second Stage') {
            steps {
                echo 'Jenkins Pipeline Second Stage'
            }
        }
    }
}
Step 2 : Build project
After building project successfully, console print following output.
[Pipeline] {
[Pipeline] stage
[Pipeline] { (Hello)
[Pipeline] echo
Hello World
[Pipeline] }
[Pipeline] // stage
[Pipeline] stage
[Pipeline] { (Second Stage)
[Pipeline] echo
Jenkins Pipeline Second Stage
[Pipeline] }
[Pipeline] // stage
[Pipeline] }
[Pipeline] // node
[Pipeline] End of Pipeline
Finished: SUCCESS
Here we can see Hello and Second Stage in Stage View.
If you get any problem in creating and building Jenkins pipeline project, comment down.


Comments
Post a Comment