Creating Jenkins Pipeline with Jenkinsfile on Git SCM (Source Code Management)
In this tutorial we will see how we can create and build Jenkins pipeline with Git SCM. We will use Jenkinsfile for build our pipeline.
Learn how we can create our first Jenkins Pipeline :
Lets follow below given steps and you have your Jenkins pipeline with Git SCM.
Step 1 : Download Git
Step 2 : Add git.exe file location in Jenkins Git Section
- Click on Manage Jenkins on Dashboard page
- Click on Global Tool Configuration
- Go to Git section and enter your git.exe path into Path to Git executable textbox
Save above configuration.
Step 3 : Create new Jenkins Pipeline
Click on New Item, You will redirect to bellowed page. Select Pipeline and enter name of your pipeline. Click on Ok button to create your Pipeline.
Step 4 : Select Pipeline Script form SCM
In Pipeline drop-down, we will have following selection.
- Pipeline script
- Pipeline script from SCM
Select 2nd option and click on Save button.
Step 5 : Copy Git Repository URL
You can also use Mine Git Repository for Testing Purpose or Fork my Repository.
pipeline {
    agent any

    stages {
        stage('First') {
            steps {
                echo 'Hello World'
            }
        }

        stage('Second') {
            steps {
                echo 'This is Demo of Jenkins Pipeline Script from SCM'
            }
        }

        stage('Third') {
            steps {
                echo 'Last stage : blogoncode.com'
            }
        }
    }
}
Step 6 : Add Git Repository URL and Branch Name into Jenkins
After selecting Pipeline script from SCM, It will open new Fields boxes for us.
- Select GIT in SCM textbox.
- Add Repository URL
- Add Branch name in Branch Specifier. We have "main" branch name.
We can also change file name but this is default name that Jenkins provide.
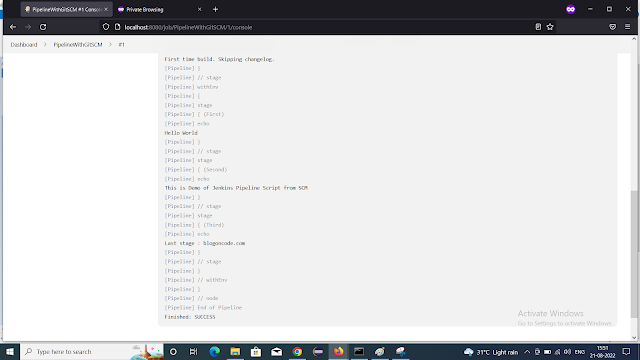
Step 7 : Build Our Pipeline Project
We have added 3 stages in Jenkinsfile
- First - Hello World
- Second - This is Demo of Jenkins Pipeline Script from SCM
- Third - Last stage : blogoncode.com


Comments
Post a Comment